

A Place To Lay Your Head
A Place To Lay Your Head
A guide on how to craft different types of shelters.


Survival situations can challenge even the most experienced adventurers, presenting unforeseen circumstances that require quick thinking and adaptability. One of the fundamental skills crucial for survival in the wild is the ability to build a shelter. A well-constructed shelter can protect you from harsh weather conditions, reduce exposure to dangerous wildlife, and significantly improve your chances of survival. Whether facing the cold, wind, rain, or sun, understanding how to create a temporary home can mean the difference between life and death. This article aims to guide you through the essentials of building survival shelters, suitable for various environments and situations.
Types of Shelters
Natural Shelters
Natural shelters, such as caves or overhangs, offer immediate protection without the need for significant alteration or effort. While they can be ideal temporary refuges, it's crucial to inspect them for safety. Check for signs of current or previous animal occupants, potential rock falls, or flooding risks. Utilizing natural landscapes not only saves energy and time but also can provide a sturdy base structure for further enhancements, such as blocking the entrance with branches or stones for added insulation and protection.
Tarp Shelters
Tarp shelters are versatile, lightweight, and easy to construct, making them a favorite among survivalists. With just a tarp and some rope, you can create various configurations to suit different weather conditions and terrains. The most common types include the A-frame, lean-to, and plow point. Each has its advantages, from quick setup times to effective rain and wind protection. Tarp shelters require minimal tools and can be elevated or grounded, providing flexibility in survival situations.
Snow Shelters
In snowy environments, shelters such as snow caves, igloos, or quinzhees can be life-saving. These shelters use the insulating properties of snow to maintain a relatively warm and protected space inside. Building them requires effort and understanding of snow conditions to ensure stability and ventilation. While they are time-consuming to construct, their warmth and protection from the elements are unparalleled in snowy conditions.
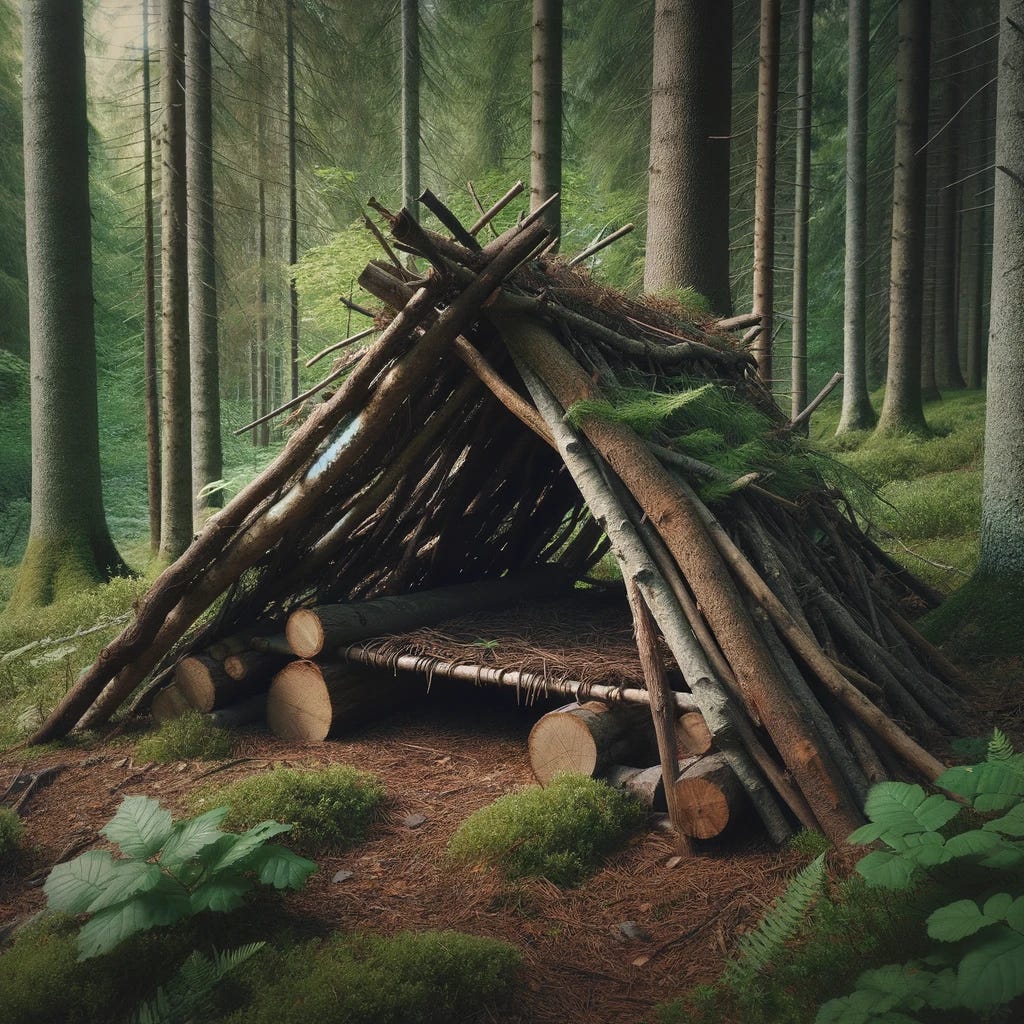
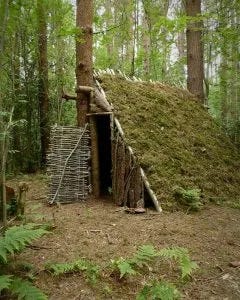
Debris Shelters
Debris shelters are made from natural materials found in the environment, such as branches, leaves, and moss. The most common type is the lean-to, which can be constructed against a fallen tree or a sturdy branch supported by two trees. The frame is then covered with smaller branches and insulated with leaves and debris. These shelters are effective in keeping you dry and insulated but require a significant amount of materials and time to build properly.

Choosing the Right Location
The location of your shelter is as crucial as the shelter itself. A good site can enhance the shelter's effectiveness, while a poor choice can negate even the most well-constructed refuge. When selecting a location, consider the following factors:
Safety First
Always prioritize safety. Avoid areas prone to natural hazards, such as flooding, avalanches, or rockslides. Stay clear of insect nests and areas where wildlife is likely to travel or feed.
Exposure to Elements
Consider the direction of prevailing winds, sun exposure, and potential for rainwater runoff. Your shelter should be positioned to minimize exposure to harsh elements while taking advantage of natural protections, like boulders or dense foliage.
Accessibility to Resources
Your site should be near essential resources, such as water, firewood, and edible plants, but not so close that your presence disrupts these resources or exposes you to additional hazards.
Flat and Stable Ground
Choose a flat area for comfort and stability. Ensure the ground is dry and not subject to flooding. If you're in a cold environment, avoid depressions where cold air settles.

Materials and Tools
Constructing a shelter requires materials that can be found in the environment or carried in a survival kit. The choice of materials often depends on the type of shelter and the environment.
Natural Materials
Branches and Logs: The backbone of many shelters. Look for strong, straight branches for framing.
Leaves, Moss, and Grass: Excellent for insulation and waterproofing.
Snow: In winter conditions, compacted snow can be an effective shelter material due to its insulating properties.
Manufactured Materials
Tarp: A versatile, waterproof material ideal for quick shelters.
Rope and Cordage: Essential for securing structures and creating tension.
Plastic Sheeting: Lightweight and waterproof, useful for insulation and rain protection.
Tools
Having the right tools can significantly ease the process of building a shelter.
Knife or Multi-tool: Crucial for cutting materials and crafting parts of the shelter.
Shovel or Snow Shovel: Useful for digging and moving materials, especially in snowy environments.
Axe or Saw: Helps in cutting larger branches or logs.
Step-by-Step Guide to Building a Basic Shelter
Constructing a basic shelter involves several key steps, from planning to finishing touches. This guide focuses on building a simple lean-to shelter, adaptable to most environments.
Step 1: Planning
Choose a location using the guidelines provided earlier. Consider the direction of the wind and the slope of the land. Plan the size of your shelter to be just large enough for you to fit inside, as smaller spaces retain heat more effectively.
Step 2: Collecting Materials
Gather materials for the frame, such as long, sturdy branches for the ridgepole and supports. Collect smaller branches, leaves, and debris for covering and insulation.
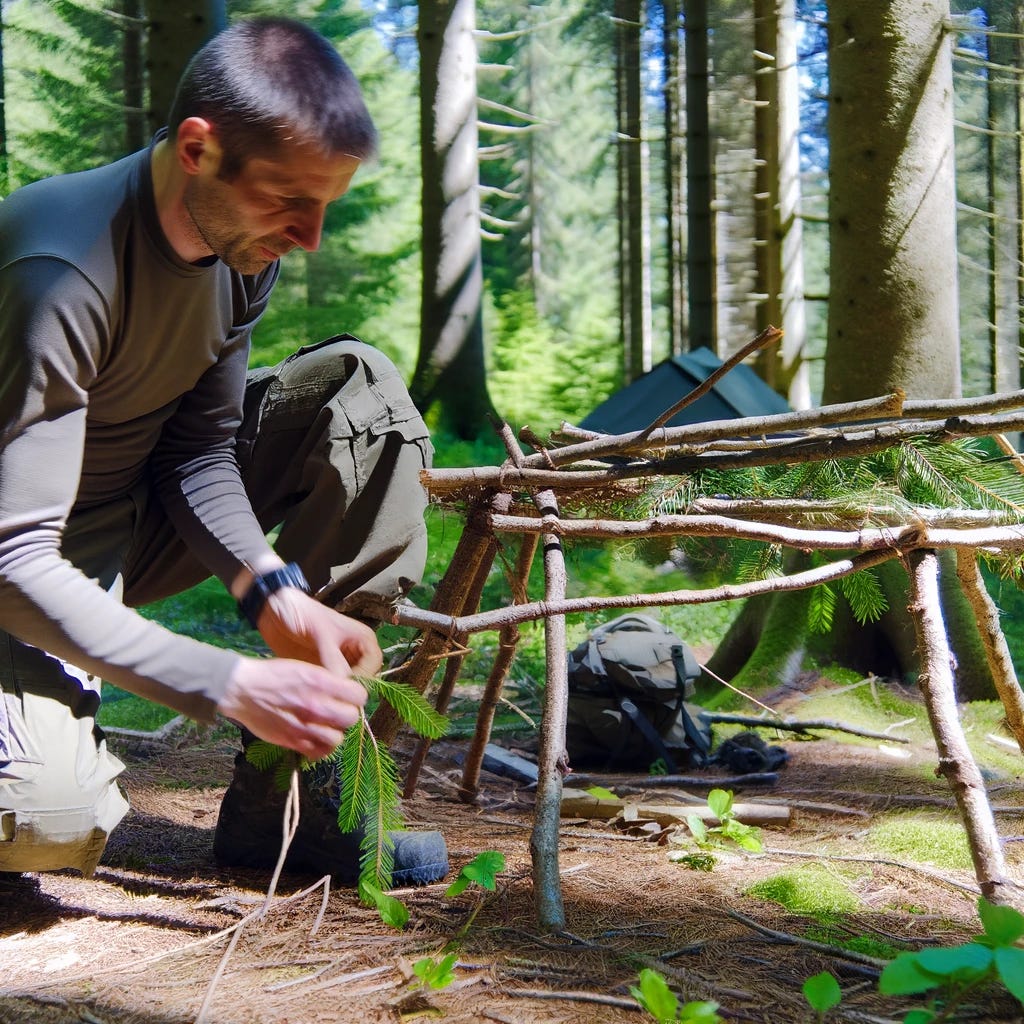
Step 3: Constructing the Frame
Find two trees roughly the distance of your body height apart, or create supports by driving sturdy branches into the ground.
Place a long, strong branch (ridgepole) across the trees or supports at waist to chest height.
Lean shorter branches at a 45-degree angle along the length of the ridgepole, creating a wall.
Step 4: Insulating and Covering
Start layering leaves, branches, and other debris over the framework. Begin at the bottom and work your way up, ensuring each layer overlaps the one below it to shed water.
For added insulation, pack moss or grass between the layers.
Step 5: Waterproofing and Windproofing
Cover the outer layer with larger leaves, bark, or additional debris to enhance waterproofing. Secure everything with additional branches or rocks if necessary.
Step 6: The Interior
Compact the ground lightly and cover it with leaves or pine needles for insulation. If possible, build a small fire pit in front of the shelter opening, ensuring there's adequate ventilation to prevent smoke buildup.
Step 7: Final Checks
Inspect your shelter for any gaps in coverage. Make adjustments as needed to ensure it's sturdy, insulated, and protected from the elements.
Insulation and Waterproofing
Insulation and waterproofing are critical for a survival shelter, particularly in harsh weather conditions. Here are techniques to enhance your shelter's warmth and dryness:
Insulation Techniques
Layering: Use dense materials like leaves, moss, or pine needles in layers to trap air and retain heat.
Packing: Fill gaps in the shelter's walls with soft, insulating materials to prevent heat loss.
Ground Insulation: Lay a thick layer of insulating materials on the shelter floor to prevent cold from seeping up from the ground.
Waterproofing Techniques
Overlapping: Ensure that the materials covering the shelter overlap like shingles, directing water away from the interior.
Tarp Usage: If available, a tarp can provide an effective waterproof layer over or under natural materials.
Natural Resins: Some trees produce resin that can be used to seal gaps. This is especially useful in wet conditions.
Conclusion
Building a survival shelter is a fundamental skill that could save your life in an emergency. By understanding the types of shelters, selecting the right location, gathering appropriate materials, and following the steps outlined, you can create a refuge in the wilderness. Remember, the key to effective shelter building is practice. Regularly honing your skills will prepare you for situations where your survival depends on the shelter you build. Always prioritize safety, stay calm, and use the resources available to you wisely.